


To test your car horn in 10 easy steps, start by gathering essential tools such as a multimeter and screwdrivers. Knowing how to test a car horn is crucial for vehicle safety and ensures your horn functions properly when needed.
Begin by locating the horn near the grille or radiator of your car.
Press the horn button and listen for sound output.
Next, check the fuse and relay to confirm they are working correctly.
Use a multimeter to inspect the wiring for any faults or breaks.
Carefully apply direct power to the horn terminals, making sure to avoid damage.
Listen for a clear, strong horn sound as an indicator of proper function.
Diagnose common issues such as blown fuses, faulty relays, or loose wires.
By following these simple steps, you’ll quickly determine if your horn requires repairs or further attention.
This method ensures your car horn remains reliable and safe to use.
Key Takeaways
- Disconnect the car battery’s negative terminal and wear safety goggles before starting any horn testing procedures.
- Press the horn button firmly and listen for a loud, clear sound to confirm initial functionality.
- Inspect and replace blown fuses or faulty relays found in the fuse box to ensure electrical flow.
- Use a multimeter to check wiring continuity and apply direct 12-volt power to the horn terminals for testing.
- Clean horn terminals and check for corrosion or damage, then retest to diagnose weak, distorted, or intermittent horn sounds.
Gather Tools to Test Your Car Horn
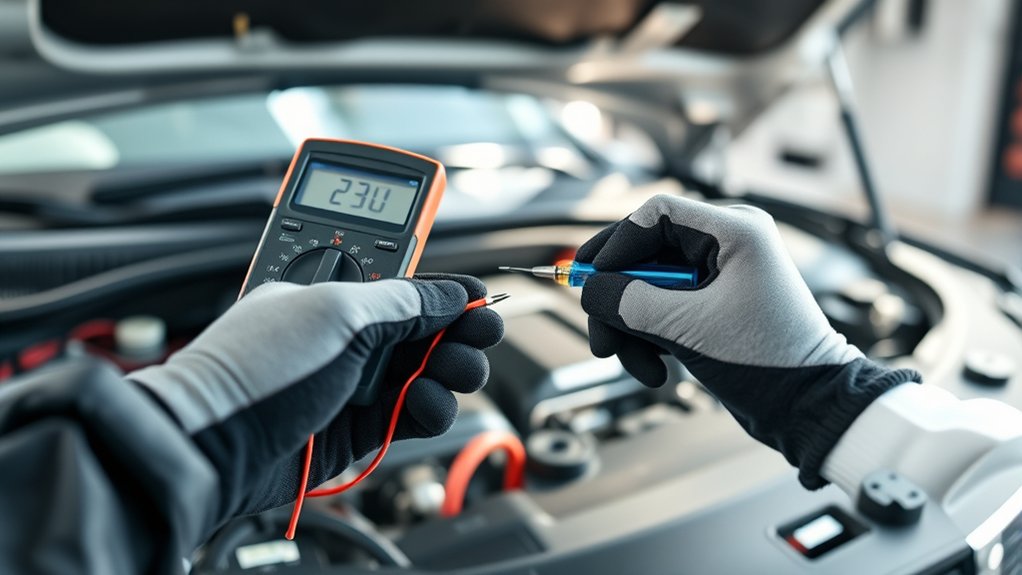
Before you begin testing your car horn, you’ll need to gather a few essential tools. Start with a multimeter, which will help you check for electrical continuity and voltage. You’ll also want a set of screwdrivers, both flathead and Phillips, to remove any panels or covers if needed.
Having a pair of insulated pliers can make handling wires safer and easier. Don’t forget some electrical tape for securing connections during testing. If your car horn uses fuses, keep a fuse puller or needle-nose pliers handy to remove them carefully.
Finally, a basic wiring diagram for your vehicle can be invaluable in understanding the horn’s circuit. With these tools ready, you’ll be set for an efficient and safe horn test.
Locate the Car Horn and Its Components
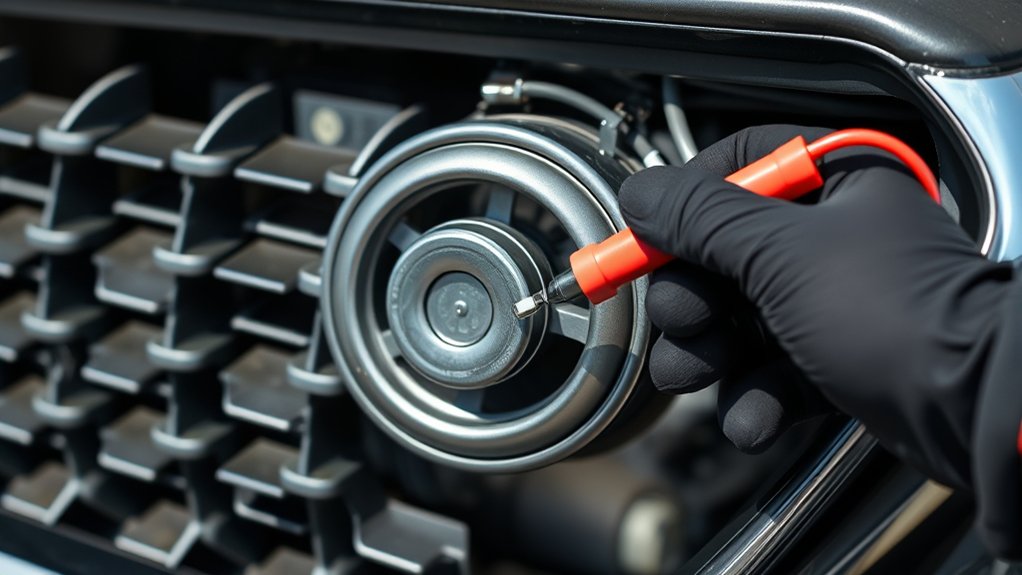
Once you know the tools you need, locate the car horn by opening the hood and looking near the front of your vehicle, often behind the grille or near the radiator. The horn typically looks like a small, round metal disc or a plastic speaker mounted on the frame. You’ll usually find one or two horns, depending on your car model.
Trace the wires connected to the horn to identify the terminals—one for power and one for ground. These wires are essential for the horn’s operation. Also, spot the mounting bracket that holds the horn firmly in place.
Familiarizing yourself with these components will help you understand how the horn connects to your car’s electrical system and prepare you to test it effectively.
Press the Horn Button to Check for Sound

Now that you’ve located the horn button, press it firmly and hold steady pressure.
Listen carefully for a clear, loud sound. If the horn doesn’t sound right, it might need further inspection or repair.
Locate The Horn Button
Where exactly is the horn button located in your car? Most often, you’ll find it right in the center of the steering wheel. It’s usually marked with a horn symbol or an embossed image.
If you don’t see a symbol, gently press the middle area of the steering wheel to test. Some vehicles have the horn integrated into the steering wheel’s airbag cover, so it might not look like a separate button.
In older cars, the horn button might be on the dashboard or a stalk near the steering column. Check your owner’s manual if you’re unsure. Knowing the exact spot helps you quickly test the horn and guarantee it’s working whenever you need it.
Apply Steady Pressure
Although it might seem simple, pressing the horn button with steady pressure is key to accurately testing your car horn. You want to guarantee consistent contact so the horn receives a clear signal.
Follow these steps to apply steady pressure:
- Place your palm firmly on the horn button, usually located in the center of the steering wheel.
- Press down evenly without jabbing or releasing quickly, holding the pressure for about two seconds.
- Keep your hand steady to avoid intermittent signals that might confuse your assessment.
Listen For Clear Sound
When you press the horn button, listen carefully for a clear, strong sound that confirms the horn is working properly. If the sound is weak, distorted, or absent, it indicates a potential issue. A crisp, consistent tone means the horn’s electrical connections and internal components are functioning as they should.
If you hear a clicking noise without a sound, the problem might be a faulty horn or a wiring issue. Test the horn in a quiet environment to avoid interference from outside noise. Repeat pressing the horn button several times to ensure the sound remains steady and reliable.
If anything seems off, consider inspecting the fuse, wiring, or the horn itself to identify and fix the problem promptly.
Check the Car Horn Fuse for Blown Connections
Since the car horn relies on electrical components, the fuse plays a crucial role in keeping the circuit safe from damage. A blown fuse can stop your horn from working entirely, so checking it is essential.
The fuse protects your car horn’s electric circuit; a blown fuse can completely disable it.
Here’s how you can quickly inspect the fuse:
- Locate the fuse box, usually under the dashboard or hood.
- Find the horn fuse by referring to the fuse box diagram.
- Remove the fuse and visually inspect it for a broken wire or burn marks.
If the fuse looks damaged, replace it with one of the same amperage. After replacement, test your horn again.
If it still doesn’t work, the issue lies elsewhere. By checking the fuse first, you can avoid unnecessary repairs and get your horn sounding again quickly.
Test the Car Horn Relay Function
Now, locate the horn relay in your vehicle’s fuse box or relay panel. Once you find it, check if the relay is clicking when you press the horn button.
This sound indicates the relay is functioning properly and sending power to the horn.
Locate The Horn Relay
Where exactly is the horn relay located in your car, and how can you test its function? The horn relay is usually found in the fuse box under the hood or beneath the dashboard. To locate it:
- Open the fuse box cover and look for a diagram showing the relay positions.
- Identify the horn relay, often labeled “HORN” or with a horn symbol.
- If your car’s manual is available, consult it to confirm the relay’s exact spot.
Once you locate the relay, you can proceed with testing its function. Knowing its position saves time and helps you troubleshoot effectively without unnecessary guesswork.
This step is essential before moving on to checking whether the relay operates correctly or needs replacement.
Check Relay Operation
After locating the horn relay, the next step is to verify if it operates correctly. First, disconnect the relay from its socket. Use a multimeter set to continuity mode or a test light.
Have a helper press the horn button while you check the relay terminals. You should hear a clicking sound when the relay activates—this indicates it’s working mechanically. Next, test for voltage at the relay’s input terminal with the horn button pressed; it should have power.
Then, check the output terminal for voltage; if the relay clicks but the output has no voltage, the relay is faulty. If the relay doesn’t click or pass voltage, replace it. This simple test guarantees the relay’s function before moving on to other horn components.
Check Horn Wiring Continuity With a Multimeter
Before you can determine if your car horn itself is faulty, you’ll need to check the wiring continuity using a multimeter. This step verifies the electrical path from the horn to the power source is intact.
Checking wiring continuity with a multimeter ensures the electrical path to your car horn is intact.
Follow these steps:
- Disconnect the horn connector to isolate the wiring.
- Set your multimeter to the continuity or resistance mode and place the probes on the horn’s wiring terminals.
- Check for a continuous beep or low resistance reading, which confirms the wiring is good.
If there’s no beep or the multimeter shows infinite resistance, the wiring may be damaged or disconnected.
Apply Direct Power to the Horn to Test Sound
Before you apply direct power to the horn, make sure you take proper safety precautions to avoid shocks or damage. Locate the horn’s power terminals carefully so you know where to connect your power source.
Use the correct voltage to prevent blowing the horn or wiring.
Safety Precautions First
When you apply direct power to the car horn, you need to prioritize safety to prevent any electrical issues or personal injury. Before you start, make sure the car’s ignition is off to avoid accidental shorts. Use insulated tools to handle wires and connections, reducing the risk of electric shock.
Also, wear safety goggles to protect your eyes from sparks or debris.
Here are three key safety steps to follow:
- Disconnect the car battery’s negative terminal to minimize electrical hazards.
- Use a multimeter to verify no current flows before touching terminals.
- Keep your hands dry and stand on a non-conductive surface to avoid grounding yourself.
Following these precautions keeps you safe while testing the horn’s sound.
Locate Horn Power Terminals
Although locating the horn power terminals might seem tricky at first, you can find them quickly by checking under the hood near the front grille or behind the radiator. Look for a round, disc-shaped device with two terminals sticking out. These terminals are where the power wires connect to the horn.
One terminal usually connects to the car’s battery positive side, and the other is grounded. To test the horn, you’ll need to apply direct power to these terminals. Before doing so, visually inspect the terminals for corrosion or damage, and clean them if necessary.
Once you identify the positive and negative terminals, you’re ready to proceed with applying power and checking if the horn sounds correctly. This step is essential for diagnosing whether the horn itself is functioning.
Use Proper Power Source
How exactly do you apply power to test your car horn? First, you’ll want to use a proper power source—typically your car’s 12-volt battery. Applying direct power helps you bypass any wiring issues and isolate the horn’s sound quality.
Here’s how to do it safely:
- Connect a jumper wire from the positive terminal of the battery to the horn’s positive terminal.
- Attach another wire from the horn’s negative terminal to the battery’s negative terminal or a good ground.
- Listen carefully for a clear, loud sound indicating the horn works properly.
Make sure you avoid touching metal parts simultaneously to prevent sparks or shorts. Using the battery’s power directly is the most reliable way to test your car horn’s functionality.
Listen for Weak or Unusual Horn Sounds
Because a car horn is meant to produce a loud, clear sound, any weak or unusual noises can indicate a problem. When you test your horn, listen carefully for sounds that are faint, distorted, or inconsistent. These clues can help you identify issues early.
| Sound Type | Description | Possible Cause |
|---|---|---|
| Weak | Soft or barely audible horn | Low power or wiring issue |
| Distorted | Crackling or buzzing tone | Damaged horn diaphragm |
| Intermittent | Horn cuts in and out | Loose connection |
| Unusual Pitch | Higher or lower than normal | Electrical problems |
Pay attention to these sound variations during your test to better understand your horn’s condition.
Diagnose Common Car Horn Problems and Fixes
When your car horn doesn’t sound right, you can usually pinpoint the problem by checking a few common issues like blown fuses, faulty wiring, or a bad horn relay. Start by inspecting these areas to diagnose the problem:
- Blown Fuse: Locate the fuse box, find the horn fuse using the diagram, and see if it’s blown. Replace it if necessary.
- Faulty Wiring: Look for damaged or loose wires around the horn and steering wheel. Repair or reconnect any faulty wiring.
- Bad Horn Relay: The relay controls power to the horn. Swap it with a similar relay in the fuse box to test if the relay is the culprit.
Retest the Horn After Repairs to Confirm It Works
After fixing common issues like blown fuses, faulty wiring, or a bad relay, you’ll want to retest your car horn to make sure it’s working properly. Start by turning on your vehicle’s ignition without starting the engine, then press the horn button firmly. Listen carefully for a clear, loud sound.
If the horn works as expected, you’ve successfully resolved the problem. If it still doesn’t sound right or remains silent, double-check your repairs and connections. Sometimes, a loose wire or improperly seated fuse can cause issues.
Don’t forget to test the horn multiple times to confirm consistent operation. Once you’re confident the horn is functioning, you can safely rely on it while driving. Rechecking ensures your repairs were effective and boosts your vehicle’s safety.
Frequently Asked Questions
Can a Faulty Horn Drain My Car Battery?
Yes, a faulty horn can drain your car battery if it’s stuck on or has an electrical short. You should check for continuous power draw and fix any wiring issues to prevent battery drain.
Are Car Horn Sounds Regulated by Law?
Your car horn’s sound is indeed regulated by law, symbolizing safety’s call to action. You must guarantee it meets volume and tone standards to protect yourself and others, keeping the road a respectful, harmonious space.
How Loud Should a Car Horn Be?
Your car horn should be between 100 and 110 decibels, loud enough to alert others without causing damage or discomfort.
Check local regulations since limits can vary, and make sure it’s clear and distinct.
Can Weather Affect Car Horn Performance?
Imagine your horn as a singer; cold weather can make it hoarse, and moisture can muffle its voice.
Is It Safe to Drive With a Broken Horn?
It’s not safe to drive with a broken horn because you won’t be able to warn others in emergencies. You should get it fixed promptly to avoid potential accidents and guarantee your safety on the road.
Conclusion
Now that you’ve followed these steps, imagine your car horn sounding clear and strong, cutting through the morning fog like a confident call. Testing and fixing your horn isn’t just about noise—it’s about safety and being heard when it matters most.
With your tools in hand and newfound knowledge, you’re ready to keep your vehicle’s voice loud and reliable. Trust your work; every honk now echoes your care and attention.
Regular car horn testing ensures your horn functions correctly, enhancing road safety. By maintaining a strong and reliable horn, you protect yourself and others on the road. Keep these easy steps in mind to test a car horn effectively whenever needed.

